
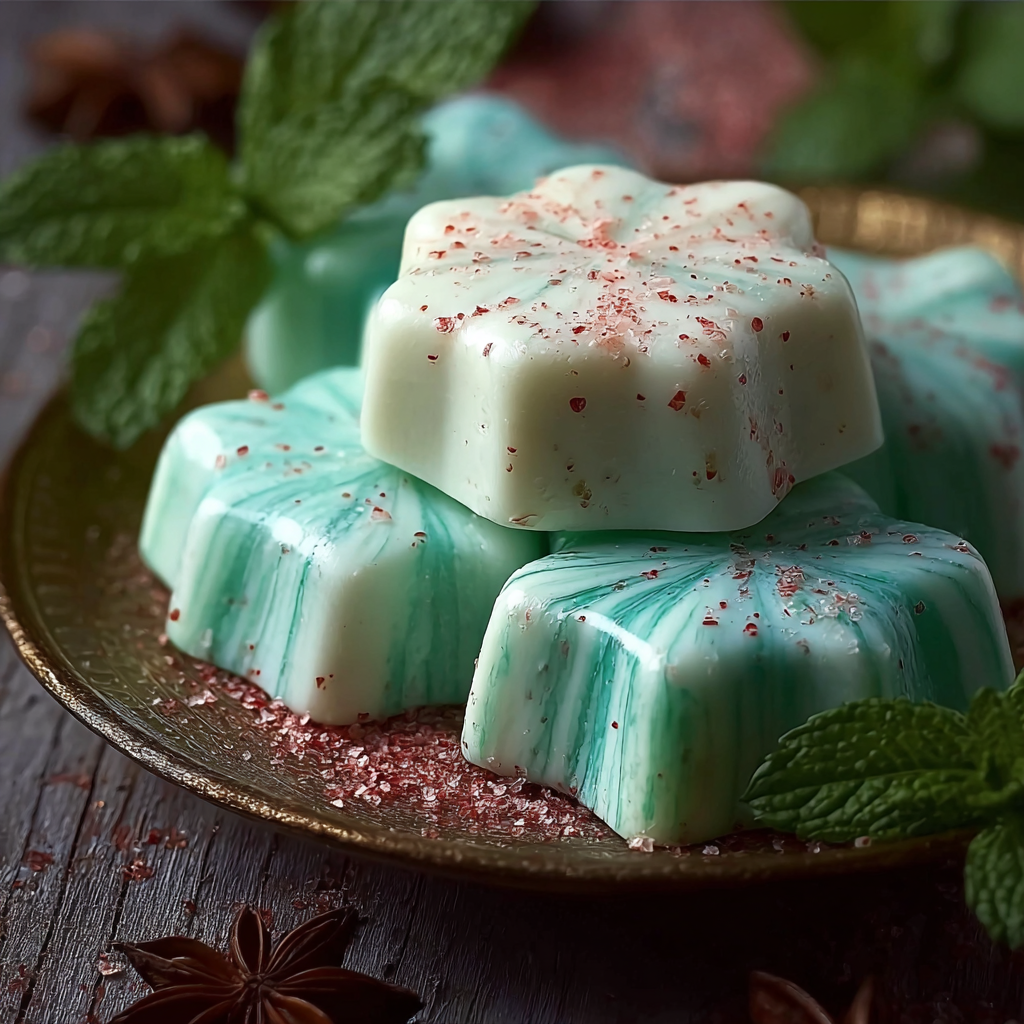
Mint Butter Candy

Creamy, mint-flavored butter candies that melt on the tongue — an easy, no-cook treat perfect for holidays, gifts, or an afternoon sweet bite.

This mint butter candy has been my go-to quick treat for holidays and last-minute gifts for years. I first developed this version during a snowy December when I wanted something nostalgic that reminded me of old-fashioned mints but with a creamier texture. The combination of softened unsalted butter and sifted powdered sugar yields a velvety, melt-in-your-mouth center brightened by peppermint extract. Making them feels like folding sweet clouds into a concentrated mint flavor; every bite dissolves and leaves that cool peppermint finish that makes people smile.
I discovered how forgiving this mixture is when I overworked it once and it still came together after a rest in the fridge. These candies are special because they require no tempering, no candy thermometer, and no stovetop work — just a bowl, a mixer, and a bit of patience while they firm up. They are perfect for packaging in small boxes with tissue paper and make a thoughtful edible gift. Between the creamy texture and the crisp peppermint note, they sit somewhere between a classic butter cookie and a molded fondant, but with the simplicity of a bowl recipe.
Why You'll Love This Recipe
- Ready with minimal hands-on time: about 15 minutes to prepare and a short chilling period; ideal for last-minute treats.
- Uses pantry staples: unsalted butter and powdered sugar are probably already in your kitchen, with peppermint extract for a bright finish.
- Makes an excellent make-ahead gift: freezes well and ships easily when wrapped in parchment paper or placed in small tins.
- Customizable: add gel coloring for festive hues or press with a fork for a classic look; works well for dietary swaps as explained below.
- Crowd-pleaser texture: creamy center that holds its shape but melts on the tongue, bridging between candy and creamy confection.
- Simple equipment: no special tools required—an electric mixer speeds things up but a sturdy spatula will do in a pinch.
I remember handing out a tin of these at a neighbors holiday gathering; the little box disappeared first. My niece declared them her favorite because they tasted like the mint cookies she loved but were softer. Over the years I have adjusted the peppermint level and the cream to balance firmness and melt, learning that a tablespoon of heavy cream gives the ideal texture without making them greasy.
Ingredients
- Unsalted butter (1/2 cup; softened): Choose high-quality butter such as Kerrygold or Plugra for a rich mouthfeel. Bring to room temperature but avoid melting it—softened to the touch provides the best emulsification with sugar.
- Powdered sugar (4 cups, sifted): Use confectioners sugar (about 1 pound) for a smooth, dust-free finish. Sifting removes lumps and ensures a silky texture; look for 10X or 6X grind depending on brand availability.
- Heavy cream or whole milk (1 tablespoon): Heavy cream gives a richer, creamier center and helps achieve a smoother, pipeable consistency. If you prefer a lighter version, whole milk will work but expect slightly less richness.
- Peppermint extract (1/2 teaspoon): Use pure peppermint extract for a clean, cool flavor. Avoid artificial mint oils that can be overly strong; start with the suggested amount and add more if desired.
- Salt (1 pinch): A tiny pinch of salt balances sweetness and brings out the butter flavor. If using salted butter, reduce or omit this pinch.
- Gel food coloring (optional): A tiny dab of gel coloring creates festive greens or pale pinks without watering down the mixture. Gel is preferred because it does not alter consistency.
Instructions
Prepare the Butter: Place 1/2 cup softened unsalted butter in a medium mixing bowl. Use a stand mixer fitted with the paddle attachment or an electric hand mixer on medium speed. Cream the butter until smooth and slightly pale, about 1 to 2 minutes. The goal is to loosen the butter so it blends evenly with sugar without melting it. Incorporate the Sugar: Sift 4 cups powdered sugar into the bowl in two additions. Mix slowly on low to avoid a cloud of sugar; once mostly incorporated, increase speed to medium and beat until the mixture looks uniform and slightly fluffy, about 2 to 3 minutes. Scrape the bowl as needed to ensure even mixing. Add Cream and Flavor: Pour in 1 tablespoon heavy cream and 1/2 teaspoon peppermint extract along with a pinch of salt. Mix on low to combine, then on medium until the mixture forms a soft, pipeable paste. If using gel coloring, add a tiny amount now and gently fold until the color is even. Avoid adding too much liquid; the mixture should hold shape. Shape the Candies: Transfer the mixture to a piping bag fitted with a plain round tip or use a small spoon to drop dollops onto a baking sheet lined with parchment or silicone. For uniform pieces, aim for about 1 teaspoon each; this should yield roughly 24 pieces. Press each mound lightly to even the surface if desired. Chill to Set: Refrigerate the tray for at least 30 minutes to firm the candies. For firmer candies that travel well, freeze for 15 minutes and then store in the refrigerator. They will keep their shape better and be less sticky when wrapped. Finish and Store: Once set, dust lightly with sifted powdered sugar if you prefer a classic look or leave plain for a glossy finish. Store in an airtight container layered with parchment at cool room temperature for short-term storage or in the refrigerator for longer keeping.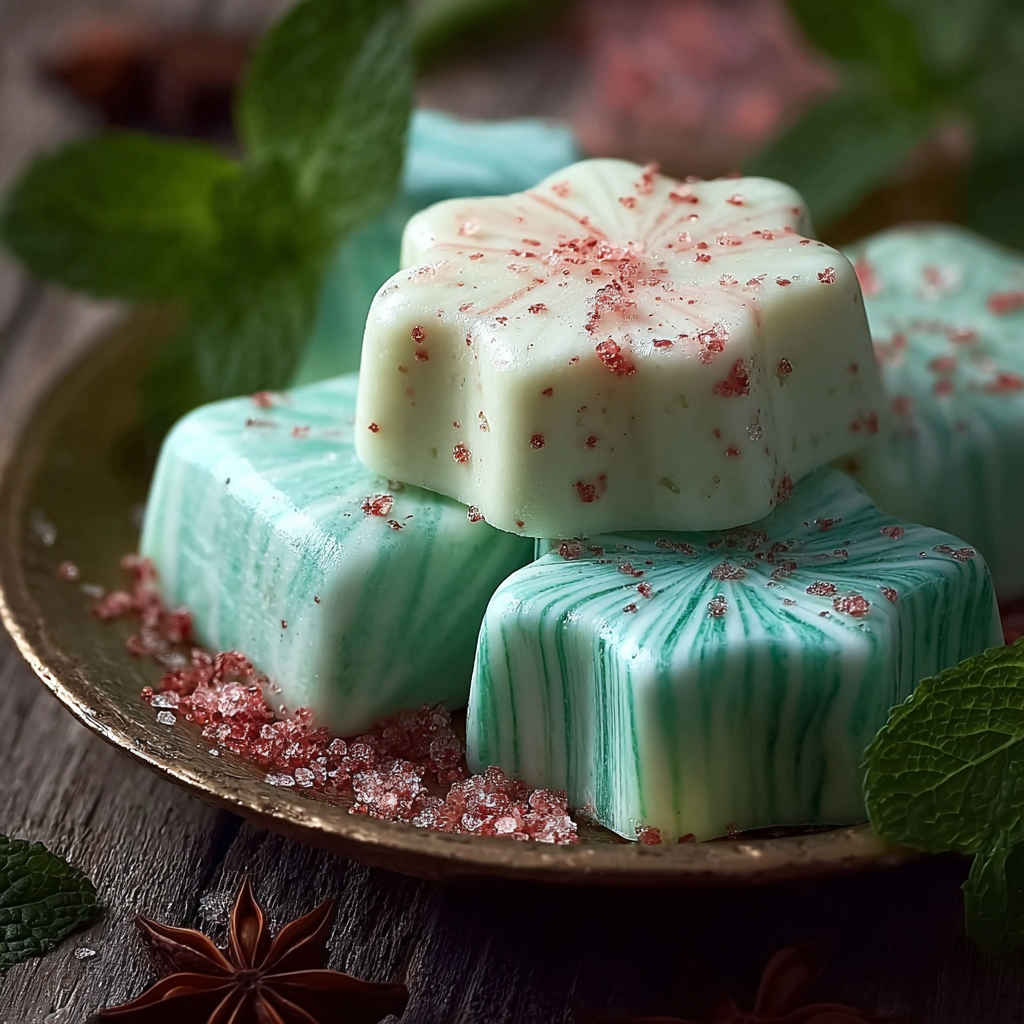
You Must Know
- High in sugar: the confection is primarily powdered sugar; portion control is key for balance with other sweets.
- Storage: refrigerate for up to 2 weeks or freeze for up to 3 months; bring to room temperature before serving for best texture.
- Texture cues: the mixture should be soft and hold shape; if it is too stiff add a tiny bit more cream, too soft — add a tablespoon more sifted sugar.
- Allergy note: contains dairy from butter and cream; see substitutions below for dairy-free guidance.
My favorite aspect is the way these transform with small flavor tweaks: a touch more peppermint turns them into a festive breath-freshener while a hint of vanilla makes them taste almost like a buttery fondant. I often make two batches — one classic and one dipped in dark chocolate for a contrasting bite. Family members have different favorites; one prefers them plain while another likes a green tint to match holiday decor.
Storage Tips
Store finished pieces in an airtight container layered with parchment paper to prevent sticking. At cool room temperature they will keep for several days in a low-humidity environment; refrigerate for up to two weeks. For long-term storage, freeze them in a single layer on a baking sheet until firm, then transfer to a sealed freezer-safe container for up to three months. To serve from frozen, thaw in the refrigerator for 30 minutes and then sit at room temperature 10 to 15 minutes so they regain a creamy mouthfeel. Avoid high heat or direct sunlight which will make them soft and glossy.
Ingredient Substitutions
For a dairy-free version, replace butter with a high-quality vegan butter (stick style) and use full-fat coconut cream instead of heavy cream; expect a faint coconut note. If you need a lower-sugar alternative, try a blend of powdered sugar and a powdered erythritol blend designed for baking — texture will be slightly different and you may need to add a stabilizer like a teaspoon of cornstarch to avoid graininess. Vanilla extract can replace peppermint for a different flavor profile; increase extract to 3/4 teaspoon if using weaker natural extracts.
Serving Suggestions
Serve these on a small candy plate dusted with extra powdered sugar, or place in mini cupcake liners for gifting. Pair with black coffee or a mint green tea to complement the peppermint. For a holiday platter, alternate colors and shapes and add dark chocolate-dipped halves for textural contrast. They also make excellent after-dinner mints when offered with espresso or a small pour of dessert wine like Moscato.
Cultural Background
Mint-flavored confections have a long history across many cultures, from Middle Eastern mint-infused sweets to European fondant candies and British peppermint creams. This particular butter-based version is an American home-kitchen adaptation that emphasizes ease over confectionery technique. It draws inspiration from classic butter mints and fondant-style candies popular in holiday boxes, updated to require no boiling sugar or syrup work. The result preserves the heritage of mint confections while making them accessible for home cooks of any skill level.
Seasonal Adaptations
For winter holidays, tint the mixture a pale green or red and add a few drops of natural peppermint oil for a brighter finish. In spring, try swapping peppermint for spearmint and adding finely grated lemon zest for a fresher profile. For summer gatherings, chill slightly and serve with a small, chilled herb sprig like mint or basil for contrast. These adaptations let the basic formula sing in any season with just small swaps to complement available produce and holiday themes.
Meal Prep Tips
To prepare ahead, make the mixture and portion into a piping bag, then freeze the filled bag for up to one month. When needed, snip the tip and pipe onto parchment and allow to firm in the refrigerator. This saves time when assembling gift boxes or hosting events. Label containers with the date and flavor variations, and store different flavors in separate layers of parchment to avoid flavor transfer. For travel, pack candies in tins with parchment layers and include a small desiccant packet for very humid climates.
These mint butter candies are a small, joyful confection that invite experimentation and sharing. Whether tucked into a holiday tin, left on a neighbor s doorstep, or arranged on an after-dinner tray, they deliver a creamy peppermint moment that brightens any table. Try making a double batch — they are surprisingly addictive and disappear fast.
Pro Tips
Sift the powdered sugar to avoid lumps and achieve a silky texture.
If mixture is too stiff, add cream 1/4 teaspoon at a time until desired consistency.
For travel-friendly candies, freeze briefly to firm before packing in tins with parchment.
This nourishing mint butter candy recipe is sure to be a staple in your kitchen. Enjoy every moist, high protein slice — it is perfect for breakfast or as a wholesome snack any time.
FAQs about Recipes
How long do these candies keep?
Yes. Store in the refrigerator for up to two weeks or freeze for up to three months in an airtight container.
What's the best way to shape them?
Use a piping bag for uniform shapes or a teaspoon to drop dollops; chilling helps them firm quickly.
Tags
Mint Butter Candy
This Mint Butter Candy recipe makes perfectly juicy, tender, and flavorful steak every time! Serve with potatoes and a side salad for an unforgettable dinner in under 30 minutes.
Ingredients
Base
Instructions
Cream the butter
Place 1/2 cup softened butter in a bowl and beat until smooth and slightly pale, about 1 to 2 minutes.
Add powdered sugar
Sift 4 cups powdered sugar into the bowl in two additions and mix on low then medium until uniform and fluffy, about 2 to 3 minutes.
Add cream and peppermint
Stir in 1 tablespoon heavy cream, 1/2 teaspoon peppermint extract, and a pinch of salt; mix to form a soft, pipeable paste.
Shape candies
Pipe or spoon teaspoon-sized dollops onto parchment-lined sheet; press lightly to even if desired.
Chill to set
Refrigerate for at least 30 minutes or freeze briefly for firmer candies before storing.
Last Step: Please leave a rating and comment letting us know how you liked this recipe! This helps our business to thrive and continue providing free, high-quality recipes for you.
Nutrition
Did You Make This?
Leave a comment & rating below or tag
@feedcooks on social media!
Categories:
You might also like...
Air Fryer Bang Bang Cauliflower
Crispy air-fried cauliflower tossed in a creamy, sweet-spicy bang bang sauce. A crowd-pleasing appetizer or vegetarian main that's quick, crunchy, and addictive.

Air Fryer Buffalo Cauliflower
Crispy, tangy buffalo cauliflower made in the air fryer for a fast, crowd-pleasing appetizer or snack ready in under 30 minutes.

Air Fryer Honey Butter Garlic Chicken
Crispy air-fried chicken pieces tossed in a glossy honey-butter garlic glaze — a 20-minute weeknight favorite that's sweet, savory, and irresistibly sticky.
Did You Make This?
Leave a comment & rating below or tag @feedcooks on social media!
Rate This Recipe
Share This Recipe
Enjoyed this recipe? Share it with friends and family, and don't forget to leave a review!
Comments (1)
This recipe looks amazing! Can't wait to try it.
Comments are stored locally in your browser. Server comments are displayed alongside your local comments.
Hi, I'm Lena!
What's Popular
Get My 30-Minute Meals email series!
Quick and easy dinner ideas delivered to your inbox.