
Mackinac Island Fudge

A simple, old‑fashioned Mackinac Island fudge — creamy, chocolatey, and ready in minutes. Perfect for gifting or a nostalgic sweet bite.
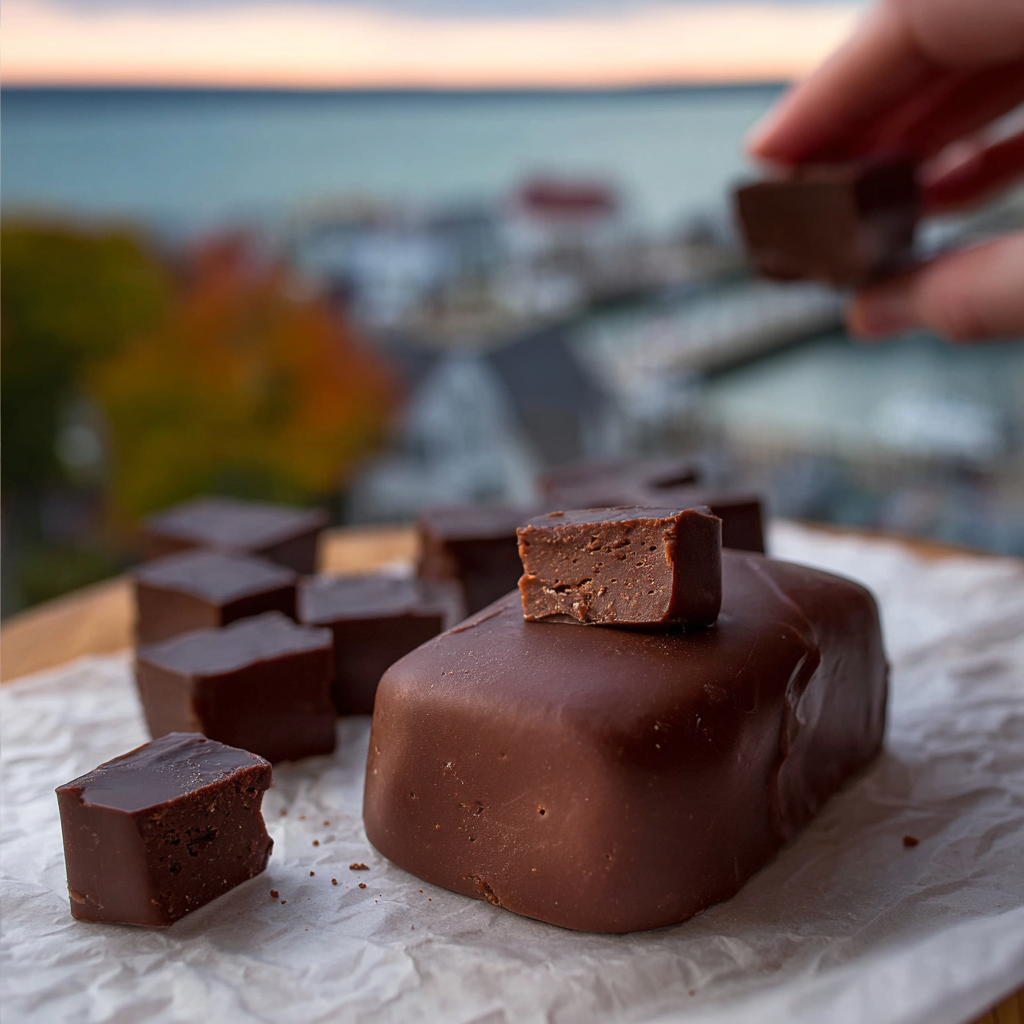
This Mackinac Island fudge is one of those recipes that arrived in my life like a warm invitation: unpretentious, comforting, and instantly nostalgic. I first tasted a similar style of fudge on a family visit to the Straits of Mackinac years ago, bought at a small shop where the aroma of chocolate and butter filled the air. I tried to recreate that dense, creamy texture at home using pantry staples and a straightforward method, and this version became the one we make whenever friends come over or when I want a quick, satisfying sweet to wrap and share.
What makes this fudge special is its old‑school simplicity — no candy thermometer, no complicated stages. A short, gentle boil melds butter, milk, and sugars into a rich base; a handful of unsweetened cocoa and a generous dusting of confectioners' sugar finish it off. The result is a sliceable, slightly chewy fudge with a glossy surface, balanced sweetness, and the deep cocoa notes that remind me of that waterfront candy shop. It’s the kind of treat children crowd around and adults savor with coffee after dinner.
Why You'll Love This Recipe
- Requires only common pantry ingredients — butter, two sugars, milk, cocoa, and confectioners' sugar — so you can make it without a special candy thermometer or rare items.
- Quick to prepare: active time is about 10 minutes and a 6‑minute gentle boil creates the correct texture, making it a perfect last‑minute gift option.
- Delivers a classic Mackinac‑style texture: dense, creamy, and slightly chewy with a smooth mouthfeel from confectioners' sugar.
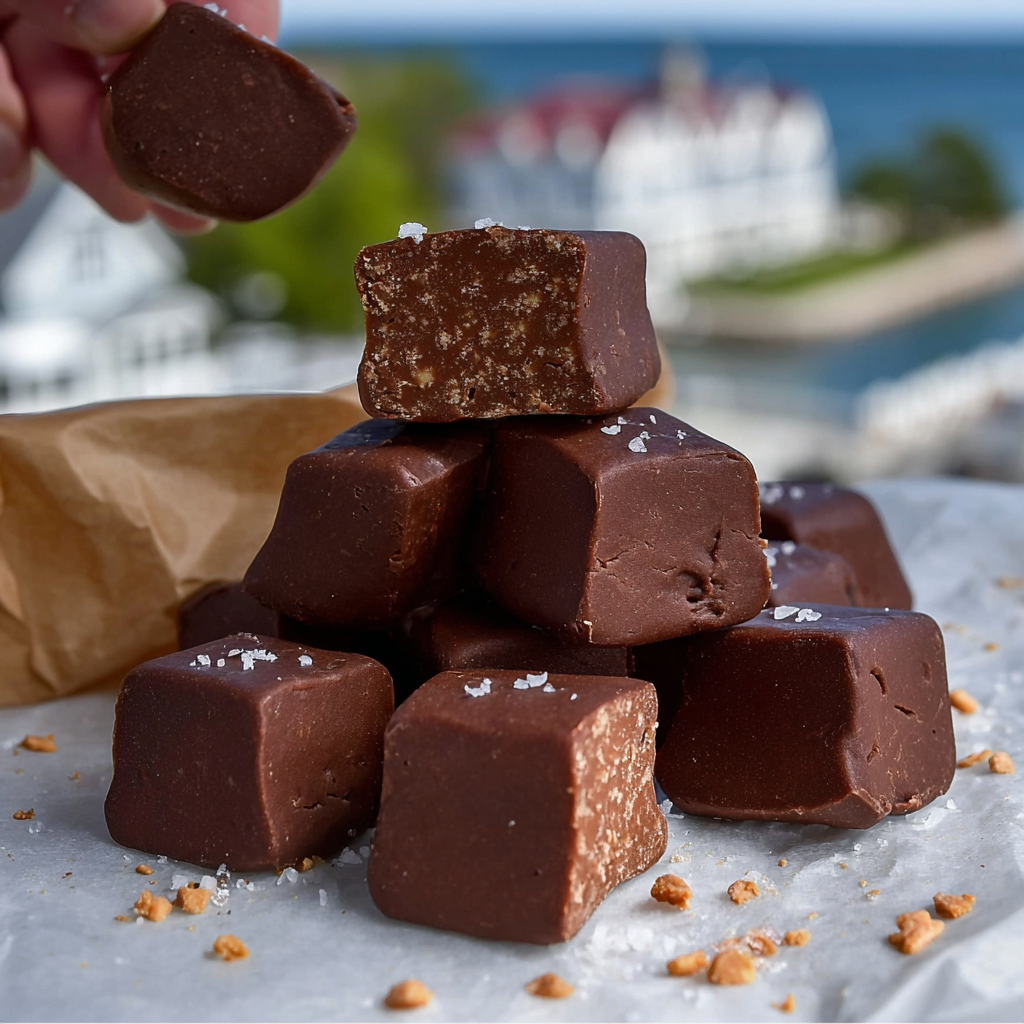
- Adaptable: easily flavored with vanilla, a splash of bourbon, or a pinch of sea salt to create signature variations for holidays and parties.
- Make‑ahead friendly: it stores and slices well after chilling, so you can prepare it a day in advance for gatherings or packages.
- Kid‑friendly to make together: simple stirring and pouring steps make it a great activity for older children under supervision.
My family’s reaction the first time I served this was immediate — the youngest asked for seconds and the rest of us kept returning to the tin over the following days. It’s become my fallback when I need a quick, impressive sweet to take to potlucks or to wrap in waxed paper for neighbors.
Ingredients
- Unsalted butter (8 tablespoons): Use real unsalted butter for a clean flavor; salted butter can be used if you reduce added salt, but unsalted gives you better control. I like a European‑style butter for slightly deeper flavor.
- Milk (1/2 cup): Whole milk is best for richness and a smooth set. Low‑fat milks will make the texture slightly firmer and less creamy; avoid non‑dairy milks unless you adjust fat content.
- Granulated white sugar (1/2 cup): Regular cane or beet granulated sugar works fine — it dissolves quickly in the milk and butter base.
- Brown sugar, firmly packed (1/2 cup): Light or dark brown both work; brown sugar adds depth and a hint of molasses that rounds out the chocolate.
- Pinch of salt: Enhances the chocolate notes; use fine salt so it dissolves readily in the hot mixture.
- Vanilla extract (1 teaspoon): Pure vanilla is worth the small cost here — it lifts the chocolate flavor beautifully.
- Unsweetened cocoa powder (1/2 cup): Use a natural or Dutch‑processed depending on what you have. Natural cocoa gives a brighter, more acidic chocolate that pairs nicely with the brown sugar.
- Confectioners' sugar (2 cups): Also called powdered sugar; this is what gives the fudge its firm, smooth finish. Sift it if it’s lumpy.
Instructions
Combine the base: In a medium saucepan over medium heat, add 8 tablespoons unsalted butter, 1/2 cup milk, 1/2 cup granulated sugar, 1/2 cup brown sugar (firmly packed), and a pinch of salt. Stir constantly so the sugars dissolve fully and the butter melts uniformly. Bring the mixture to a gentle boil — you’re looking for small bubbles around the edge rather than a rolling boil. Boil with attention: Once boiling, reduce heat to low and continue to cook for about 6 minutes, stirring constantly with a wooden spoon or silicone spatula. This short, controlled boil concentrates flavors and helps create the proper texture; it is not a high‑temperature candy stage. Watch for a glossy appearance and slightly thicker texture when you stir. Cool slightly and flavor: Remove the saucepan from the heat and let it rest for 1–2 minutes so it’s warm, not scalding. Stir in 1 teaspoon vanilla extract, then add 1/2 cup unsweetened cocoa powder. Mix until the cocoa is fully incorporated and the mixture is uniform in color. Finish with confectioners' sugar: Working quickly but carefully, gradually add 2 cups confectioners' sugar, folding it in with a spatula until you have a smooth, thick paste. If it feels too dry, add the tiniest splash of milk; if too wet, add a spoonful more confectioners' sugar. The final texture should hold shape when spread but still be pliable. Pour and set: Turn the mixture onto a lined baking sheet or silicone mat, spreading it evenly to about 3/4–1 inch thick. Let it cool at room temperature until just warm, then shape into a log or square. Wrap tightly in plastic wrap and refrigerate for at least 30 minutes until firm for easy slicing.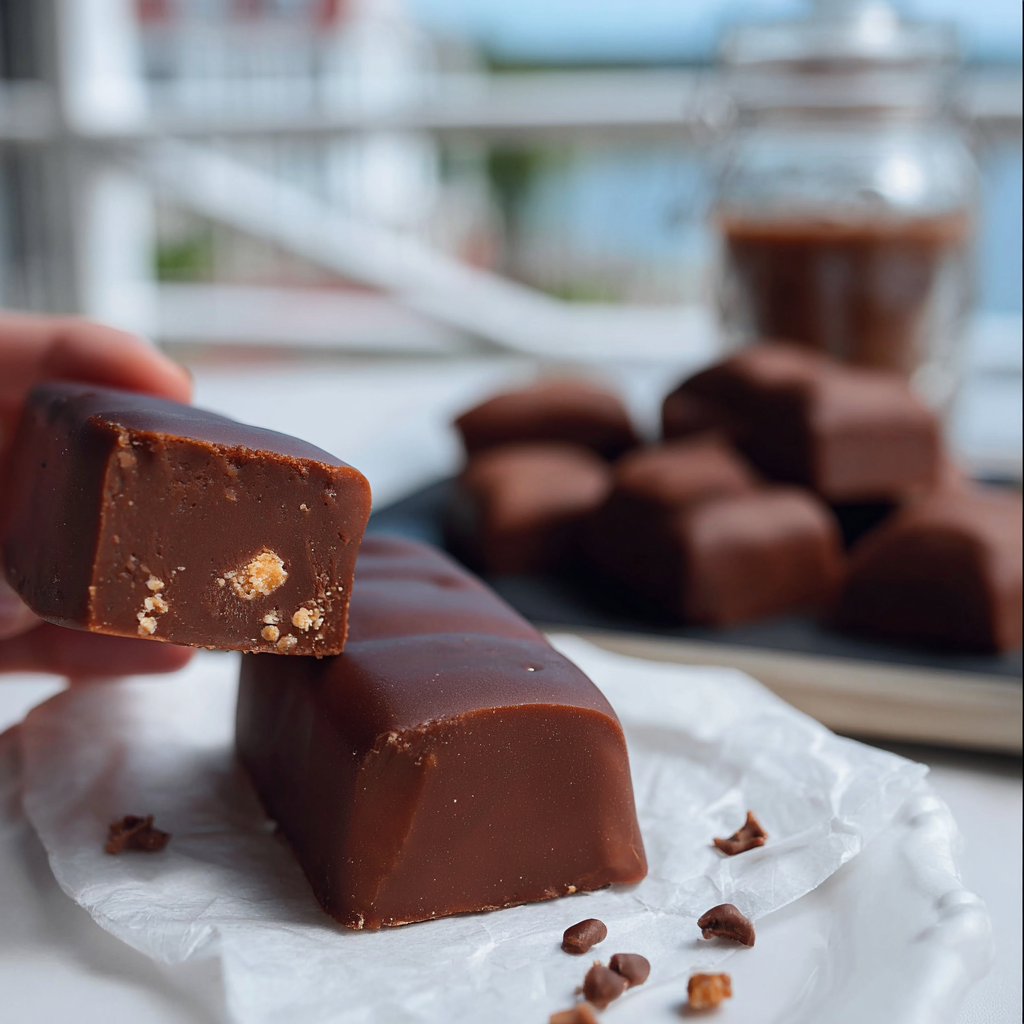
You Must Know
- This treat keeps well in the refrigerator for up to 2 weeks when wrapped tightly, or in the freezer for up to 3 months — thaw in the fridge before slicing.
- It is high in sugar and fat — a small piece (about 1 ounce) is very satisfying; plan portions accordingly if serving to guests.
- The texture depends on temperature: too hot when you add confectioners' sugar and the mixture will be too soft; too cold and it will be dry. Aim for a warm but not scalding base.
- Because this is a no‑sugar‑reduction method (no thermometer), the short six‑minute boil is the critical timing trick that creates a dense but sliceable consistency.
My favorite aspect is how reliably this method produces shop‑style fudge without fuss. On holiday mornings I’ll make a batch, cut tidy squares, and place them in little tin boxes; they travel well and always draw compliments. The smell of the butter and brown sugar mixes with cocoa to create a comforting aroma that brings back family road trips.
Storage Tips
Store chilled fudge in an airtight container or wrapped tightly in plastic wrap to protect it from fridge odors and humidity. In the refrigerator it will keep for up to two weeks; for longer storage wrap each piece in waxed paper, place in a freezer‑safe bag, and freeze for up to three months. Thaw overnight in the refrigerator before serving. If the surface gathers slight condensation after refrigeration, allow it to sit at room temperature for 10–15 minutes before unwrapping to avoid sogginess.
Ingredient Substitutions
If you need to swap ingredients, choose substitutions that preserve fat and sugar balance. Replace whole milk with half‑and‑half for a richer finish, or use 2 tablespoons of heavy cream and 6 tablespoons milk for a silkier texture. Swap brown sugar for all brown sugar of the light variety if you prefer less molasses flavor. For deeper chocolate intensity, replace up to 2 tablespoons of confectioners' sugar with additional cocoa powder and slightly more butter to keep moisture. Note: substitutions alter set and mouthfeel, so adjust confectioners' sugar a spoonful at a time.
Serving Suggestions
Serve chilled slices on a small platter with coffee or black tea — the richness pairs well with something slightly bitter. Garnish with a light dusting of cocoa or a sprinkle of flaky sea salt for contrast. For a party, place squares in mini paper liners and arrange them on a tiered tray with other small confections. They also make lovely gifts wrapped in wax paper and tied with baker’s twine.
Cultural Background
Fudge as we know it became popular in late 19th‑century America. Mackinac Island carved out a niche in candy culture, famous for its fudge shops that drew tourists with hand‑paddled copper kettles and demonstrations. The style here is inspired by the dense, slightly grainy but smooth morsels sold on the island — a tradition tied to summer travel and small‑town confectionery craft. Over time, home cooks adapted the method for stovetop convenience without specialty equipment.
Seasonal Adaptations
For winter holidays, add 1/2 teaspoon cinnamon and a pinch of nutmeg, or swirl in peppermint extract (start with 1/4 teaspoon) for a peppermint bake. In summer, stir in chopped toasted pecans or dried cherries after the confectioners' sugar is mixed to add brightness and texture. For birthday favors, fold in colorful sprinkles right before spreading.
Meal Prep Tips
Make a double batch and freeze half in pre‑sliced squares for quick gift assembly or party prep. Use shallow airtight containers layered with parchment to prevent sticking. Label containers with date and any added flavors. When packaging for gifts, use parchment or waxed paper between layers and include a small note about refrigeration if you’re shipping locally.
Whether you’re recreating a Mackinac Island memory or simply craving a straightforward chocolate treat, this fudge delivers warmth and nostalgia with minimal fuss. I hope it becomes a small ritual in your kitchen — a quick, delicious way to share a moment with someone you care about.
Pro Tips
Stir constantly during the six‑minute boil to prevent scorching and ensure even texture.
If the mixture feels too soft after adding confectioners' sugar, chill briefly and then knead in a bit more powdered sugar.
Sift confectioners' sugar before measuring to avoid lumps and ensure a smooth finish.
Use a silicone spatula to scrape the pan clean — the residual mixture helps you capture every bit of flavor.
This nourishing mackinac island fudge recipe is sure to be a staple in your kitchen. Enjoy every moist, high protein slice — it is perfect for breakfast or as a wholesome snack any time.
Tags
Mackinac Island Fudge
This Mackinac Island Fudge recipe makes perfectly juicy, tender, and flavorful steak every time! Serve with potatoes and a side salad for an unforgettable dinner in under 30 minutes.
Instructions
Combine butter, milk, and sugars
In a medium saucepan, combine 8 tablespoons unsalted butter, 1/2 cup milk, 1/2 cup granulated sugar, 1/2 cup packed brown sugar, and a pinch of salt. Heat over medium while stirring until the butter melts and sugars dissolve.
Boil gently for six minutes
Bring mixture to a gentle boil, then reduce heat to low and continue to cook for 6 minutes, stirring constantly to prevent scorching and to thicken slightly.
Cool slightly and add flavor
Remove the pan from the heat and let cool 1–2 minutes. Stir in 1 teaspoon vanilla extract and 1/2 cup unsweetened cocoa powder until completely combined and smooth.
Incorporate confectioners' sugar
Gradually fold in 2 cups sifted confectioners' sugar until the mixture forms a thick, pliable paste. Adjust with tiny amounts of milk or powdered sugar if needed to reach spreading consistency.
Spread and chill
Turn the mixture onto a lined baking sheet or silicone mat and spread to about 3/4–1 inch thick. Shape into a log or square, wrap in plastic wrap, and refrigerate for at least 30 minutes until firm for slicing.
Last Step: Please leave a rating and comment letting us know how you liked this recipe! This helps our business to thrive and continue providing free, high-quality recipes for you.
Nutrition
Did You Make This?
Leave a comment & rating below or tag
@feedcooks on social media!
Categories:
You might also like...

Air Fryer Bang Bang Cauliflower
Crispy air-fried cauliflower tossed in a creamy, sweet-spicy bang bang sauce. A crowd-pleasing appetizer or vegetarian main that's quick, crunchy, and addictive.

Air Fryer Buffalo Cauliflower
Crispy, tangy buffalo cauliflower made in the air fryer for a fast, crowd-pleasing appetizer or snack ready in under 30 minutes.

Air Fryer Honey Butter Garlic Chicken
Crispy air-fried chicken pieces tossed in a glossy honey-butter garlic glaze — a 20-minute weeknight favorite that's sweet, savory, and irresistibly sticky.
Did You Make This?
Leave a comment & rating below or tag @feedcooks on social media!
Rate This Recipe
Share This Recipe
Enjoyed this recipe? Share it with friends and family, and don't forget to leave a review!
Comments (1)
This recipe looks amazing! Can't wait to try it.
Comments are stored locally in your browser. Server comments are displayed alongside your local comments.
Hi, I'm Lena!
What's Popular
Get My 30-Minute Meals email series!
Quick and easy dinner ideas delivered to your inbox.