
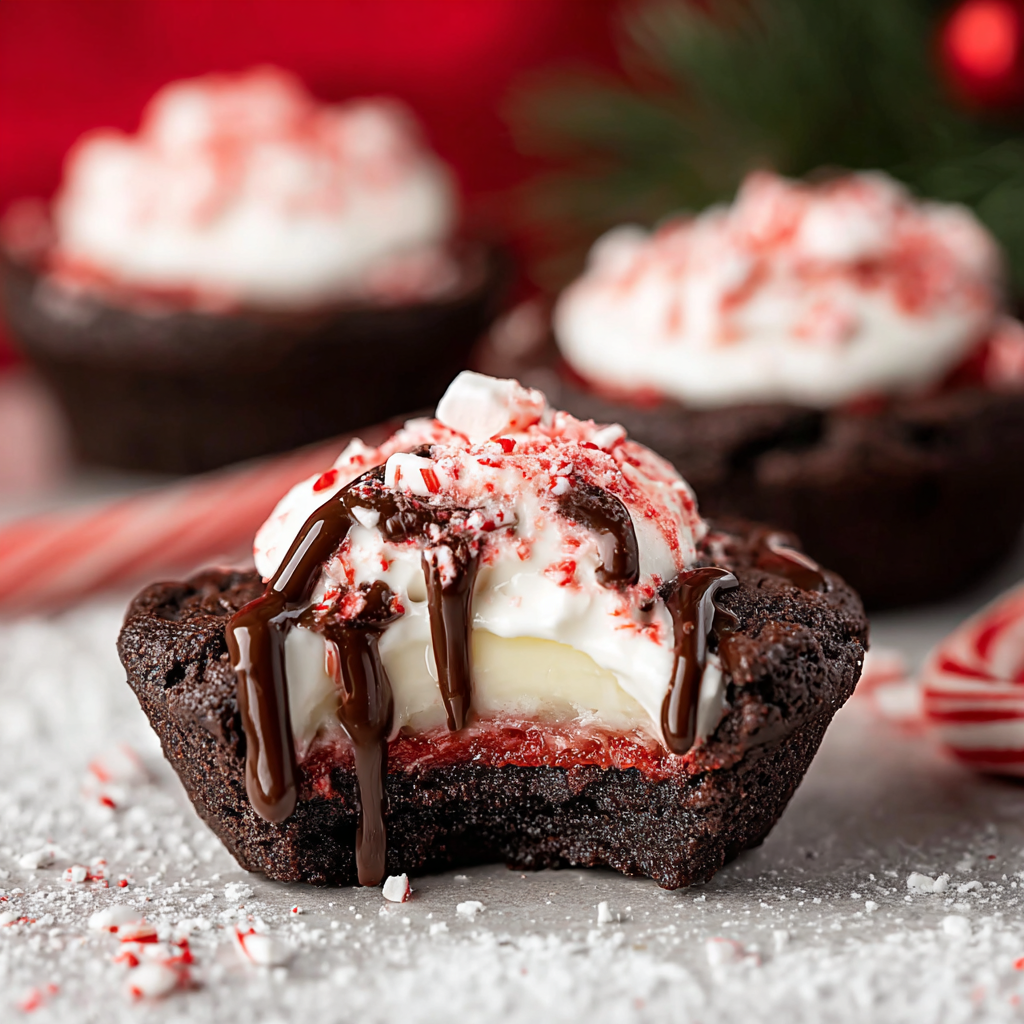
Chocolate Peppermint Cookie Cups

Decadent chocolate cookie cups filled with peppermint cheesecake — a festive, crowd-pleasing treat perfect for holiday gatherings and cookie exchanges.

This Chocolate Peppermint Cookie Cups creation has been a holiday staple in my kitchen for years. I first imagined these during a December afternoon when the house smelled of pine and my kids demanded something both chocolatey and minty. The contrast of a slightly crisp, deeply chocolate shell with a cooling, fluffy peppermint cream filling immediately won everyone over — they became the first treat to disappear at every party. I love that each bite delivers bright peppermint, rich cocoa, and a tender cookie texture that holds its shape but gives way to a soft center.
I discovered the balance of black cocoa for an almost-black appearance and Dutch-processed cocoa for rounded chocolate flavor after several tests. Using a scoop to portion the dough and pressing the centers while still warm creates a perfect cup to cradle the peppermint cheesecake filling. These are special because they travel well, make a beautiful platter, and give me a moment to add little festive touches like crushed candy cane or a dab of red color gel for that holiday pop.
Why You'll Love This Recipe
- Easy to portion and bake: with a 3-tablespoon scoop this yields uniform cups that bake evenly and are ready in about 30 minutes from start to oven.
- Pantry-friendly but festive: uses basic baking staples plus cocoa and candy canes for a seasonal finish that feels special without hard-to-find ingredients.
- Make-ahead friendly: cookie cups can be baked and frozen for weeks, while the peppermint filling whips up in minutes before serving.
- Crowd-pleasing texture: the exterior holds its shape and gives a slight crisp bite while the filling is silky and cool — perfect contrast.
- Customizable garnish: add crushed candy cane, red color gel dots, or extra chocolate drizzle to match any holiday theme or color scheme.
- Great for gift-giving and cookie exchanges: they travel well in boxes and look professional on a platter.
In my family they always spark conversation; one aunt declared them the best cookie she’d ever had at our holiday open house. I like to prepare two pans at once and freeze one tray of baked cups, so I can pull them out, fill, and garnish quickly when guests arrive.
Ingredients
- All-purpose flour: Use 2 cups of King Arthur or other trusted brands for consistent texture; measure by spooning into the cup and leveling for accuracy. It provides structure so the cups hold their shape when pressed.
- Dutch-processed cocoa powder: 1/4 cup adds depth and a smooth chocolate note; brands like Valrhona or Ghirardelli work well and reduce acidity compared with natural cocoa.
- Black cocoa powder: 1/4 cup gives an almost-black, dramatic color and an intense cocoa flavor; use for visual contrast and richer taste.
- Baking soda and salt: 1 teaspoon baking soda and 1/2 teaspoon salt balance rise and flavor; use accurate measuring spoons to keep chemistry precise.
- Unsalted butter: 1 cup at room temperature, preferably European-style unsalted butter for creaminess and higher butterfat — it makes the cookie tender and flavorful.
- Sugars: 1/2 cup granulated and 1 cup packed light brown sugar give caramel notes and moisture. Brown sugar keeps the cookie slightly chewy while granulated adds lift.
- Eggs and vanilla: Two large eggs and 1 teaspoon vanilla extract add structure, richness, and aroma. Use room-temperature eggs to help them incorporate smoothly.
- Heavy whipping cream: 1 cup cold for the peppermint filling; chilling the bowl and whisk makes it whip faster and hold peaks.
- Cream cheese: 8 ounces full-fat, room temperature for a silky, stable filling. Philadelphia or local artisan cream cheese both work.
- Peppermint extract and candy canes: 1 teaspoon extract for clear mint flavor and chopped candy canes for texture. Use clear extract to avoid cloudiness and adjust to taste.
- Red color gel: A small amount for festive dots on top — gel works best because it won’t thin the filling.
Instructions
Preheat and prepare pans: Preheat the oven to 350°F. Thoroughly spray two standard 12-cup muffin tins with nonstick cooking spray or brush with melted butter so the baked cups release easily. Having two tins ready lets you bake up to 24 cups at once. Combine dry ingredients: Whisk together 2 cups all-purpose flour, 1/4 cup Dutch-processed cocoa, 1/4 cup black cocoa, 1 teaspoon baking soda, and 1/2 teaspoon salt in a medium bowl. Sifting is optional but helps eliminate lumps and evenly distributes the cocoa. Cream butter and sugars: In a stand mixer fitted with the paddle or using a hand mixer, beat 1 cup room-temperature unsalted butter with 1/2 cup granulated sugar and 1 cup packed light brown sugar on medium-high speed for 2 to 3 minutes until light and fluffy. Scrape the bowl once for even mixing. Add eggs and vanilla: Reduce mixer speed and add two large room-temperature eggs one at a time, mixing until incorporated. Add 1 teaspoon vanilla extract. Mixing slowly prevents over-aeration that can change baking behavior. Incorporate dry ingredients: Add the flour and cocoa mixture in two additions, mixing on low until just combined. Avoid overmixing; stop when you see no streaks of flour. The dough should be firm enough to scoop but pliable. Portion dough: Using a large cookie scoop (approximately 3 tablespoons), portion dough into the prepared muffin tins. Gently press each mound into place so it contacts the pan bottom—this helps create an even cup shape while baking. Bake and form cups: Bake at 350°F for 10 to 13 minutes. The cups should be mostly set at the edges but still soft in the center. Immediately remove from oven and press a small jar or heatproof container into the center of each warm cup to form a well. Press firmly and hold for a few seconds; the warm dough will shape and set as it cools. Cool and release: Let the tins cool for 10 minutes. Loosen each cup slightly by twisting the pan, then let them cool another 5 minutes before removing and transferring to a wire rack to cool completely. Complete cooling prevents the filling from melting when added.
You Must Know
- The cups freeze well: store baked, unfilled cups in a single layer in a freezer-safe container for up to 3 months; thaw at room temperature before filling.
- Chill everything for the filling: cold cream and a chilled mixing bowl will whip faster and hold structure, keeping the filling light and stable.
- Adjust peppermint strength carefully: 1 teaspoon is bold; start with 3/4 teaspoon if you prefer a subtler mint note.
- Use full-fat cream cheese for stability; low-fat options can make the filling runny and less creamy.
- Crushed candy canes add texture but can soften if added too early; sprinkle them just before serving for crunch.
My favorite part is watching the contrast as guests bite through the chocolate shell to reveal the cool peppermint center — it always elicits delighted surprise. One year I brought a tray to a neighborhood exchange and each person asked for the recipe; these have a way of making people smile.
Storage Tips
Store filled cups in an airtight container in the refrigerator for up to 4 days. Place a sheet of parchment between tiers if stacking to protect decorations. For longer storage, freeze baked unfilled cups for up to 3 months; thaw completely at room temperature before filling. If you prepare the filling ahead, keep it chilled in a sealed container for up to 2 days and re-whip briefly before piping if it loses some volume. To reheat unfilled cups for a warm-impression serving, warm gently in a 300°F oven for 3 to 4 minutes, then cool slightly before adding filling.
Ingredient Substitutions
If you don’t have black cocoa, increase Dutch-processed cocoa by 2 tablespoons for color and flavor, though the cups will be lighter. For a dairy-free version, substitute vegan butter and a non-dairy cream cheese and use coconut cream whipped to stiff peaks; flavor and texture will vary slightly and may be softer. To make these nut-free, avoid candy canes with cross-contamination warnings. If you prefer less sugar, reduce granulated sugar in the cookie by 2 tablespoons and the filling sugar by 1 to 2 tablespoons — expect a subtly less tender cookie and a firmer filling.
Serving Suggestions
Serve chilled or at cool room temperature. Garnish each cup with a sprinkle of crushed candy cane, a small mint leaf, or a tiny red gel dot for a festive touch. Pair with strong coffee, espresso, or a peppermint hot chocolate for a coordinated flavor experience. For a party platter, arrange on a bed of fresh evergreen sprigs or serve in mini cupcake liners for easy grab-and-go appeal. These are also excellent plated with a drizzle of warm chocolate ganache for an elegant dessert course.
Cultural Background
Combining chocolate and peppermint is a long-standing holiday tradition in many Western cuisines, evoking classic candy-cane motifs and festive drinks. The idea of cookie cups draws from pastry techniques that use baked dough as edible vessels — reminiscent of tart shells and cookie cups popular in modern patisserie. This particular version mixes American cookie baking traditions with a creamy, mousse-like filling that nods to no-bake cheesecake styles common at holiday gatherings.
Seasonal Adaptations
For winter holidays stick with peppermint and red accents. In summer swap peppermint extract for vanilla or citrus and garnish with fresh berries or lemon zest. For Valentine’s Day use pink color gel and heart-shaped sprinkles; for St. Patrick’s Day try a hint of crème de menthe instead of peppermint for a green hue. Adjust garnishes seasonally — toasted coconut for tropical vibes or chopped toasted hazelnuts for autumnal depth.
Meal Prep Tips
To streamline, bake several pans of the cups and freeze them unfilled. Make the filling the morning of your event and pipe it into thawed cups an hour before serving. Use a piping bag fitted with a round tip for neat, consistent presentation. Label containers with dates and use freezer-safe trays to avoid crush damage. If transporting filled cups, chill solidly and use insulated carriers with ice packs to prevent melting.
These Chocolate Peppermint Cookie Cups are one of those treats that become a small tradition — easy to make, endlessly customizable, and reliably adored. Make a double batch this season and freeze some for unexpected guests; I promise they’ll become part of your holiday routine.
Pro Tips
Chill the mixing bowl and whisk for whipping cream faster and to better hold peaks.
Use a large cookie scoop (about 3 tablespoons) for uniform cups so they bake evenly.
Press the center while cups are hot to form a lasting well that will hold the filling without cracking.
Store unfilled cups in a single layer in the freezer to prevent condensation damage.
This nourishing chocolate peppermint cookie cups recipe is sure to be a staple in your kitchen. Enjoy every moist, high protein slice — it is perfect for breakfast or as a wholesome snack any time.
FAQs about Recipes
Can I freeze the cookie cups?
Baked but unfilled cups freeze well for up to 3 months in an airtight container. Thaw at room temperature before filling.
How do I prevent the filling from being runny?
Use full-fat cream cheese and chilled cream for a stable whipped filling. If it becomes too soft, chill and re-whip briefly.
Tags
Chocolate Peppermint Cookie Cups
This Chocolate Peppermint Cookie Cups recipe makes perfectly juicy, tender, and flavorful steak every time! Serve with potatoes and a side salad for an unforgettable dinner in under 30 minutes.
Ingredients
Chocolate Cookie Cups
Peppermint Cheesecake Filling
Instructions
Preheat and prepare pans
Preheat oven to 350°F and thoroughly spray two 12-cup muffin tins with nonstick spray or brush with melted butter so the cookie cups release easily.
Mix dry ingredients
Whisk together flour, Dutch-processed cocoa, black cocoa, baking soda, and salt in a medium bowl. Sifting helps eliminate lumps and ensures even distribution.
Cream butter and sugars
Beat room-temperature butter with granulated and brown sugar on medium-high for 2 to 3 minutes until light and fluffy, scraping down the bowl once.
Add eggs and vanilla
Reduce speed and add eggs one at a time, then add vanilla, mixing until incorporated. Use room-temperature eggs for best texture.
Combine dough
Add dry ingredients to the butter mixture in two additions, mixing on low until just combined. Avoid overmixing to keep the cookies tender.
Portion and bake
Scoop dough with a 3-tablespoon scoop into prepared tins. Bake 10 to 13 minutes until edges set but centers are still soft.
Form wells and cool
Immediately press a small jar into each warm cup to form a well. Cool in pans 10 minutes, loosen, then cool on a wire rack before filling.
Make the peppermint filling
Chill bowl and whisk, whip 1 cup chilled heavy cream to soft peaks. Beat 8 oz cream cheese with 1/2 cup sugar until smooth, fold in whipped cream and 1 teaspoon peppermint extract. Tint with red gel sparingly and pipe into cooled cups.
Last Step: Please leave a rating and comment letting us know how you liked this recipe! This helps our business to thrive and continue providing free, high-quality recipes for you.
Nutrition
Did You Make This?
Leave a comment & rating below or tag
@feedcooks on social media!
Categories:
You might also like...
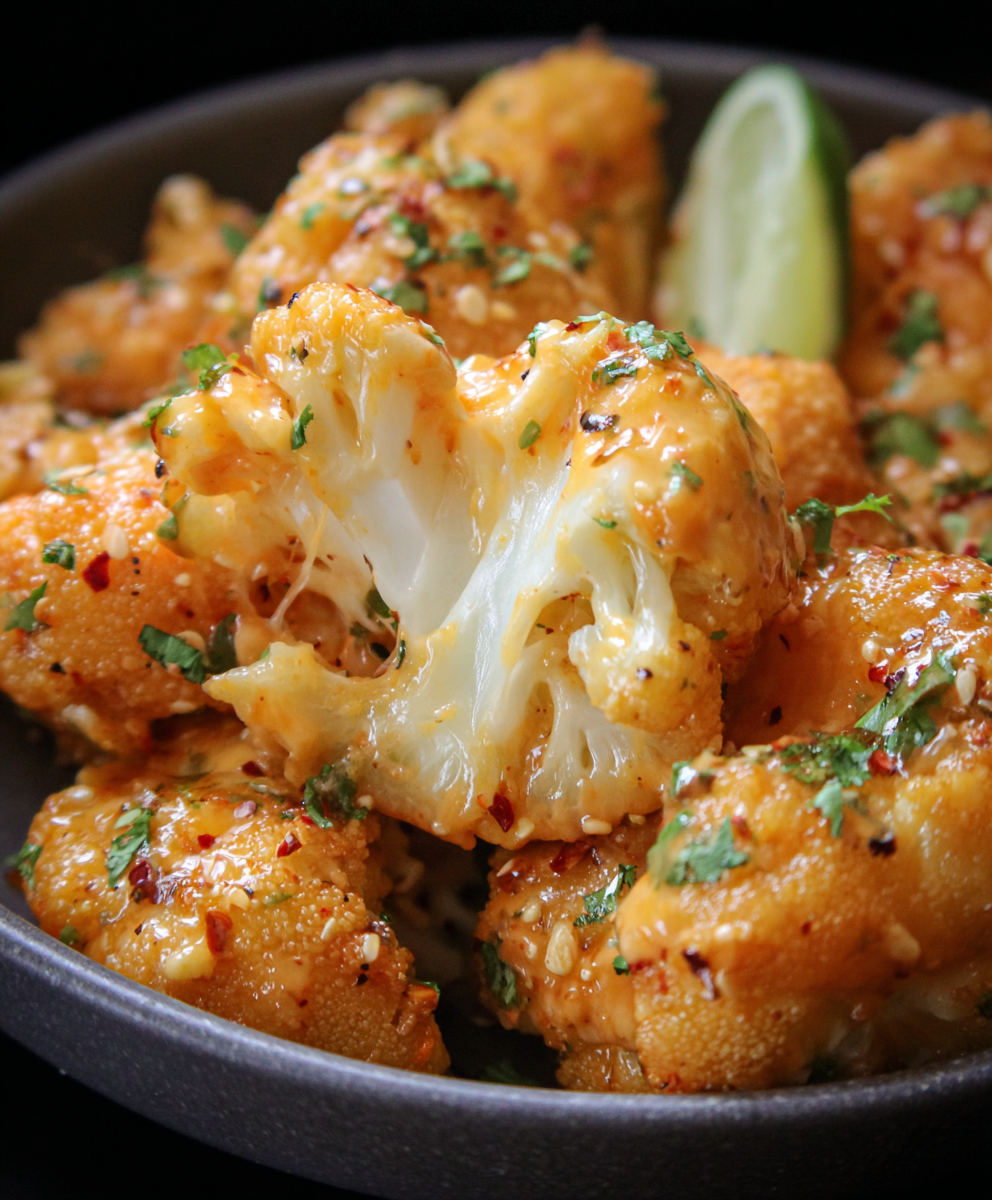
Air Fryer Bang Bang Cauliflower
Crispy air-fried cauliflower tossed in a creamy, sweet-spicy bang bang sauce. A crowd-pleasing appetizer or vegetarian main that's quick, crunchy, and addictive.

Air Fryer Buffalo Cauliflower
Crispy, tangy buffalo cauliflower made in the air fryer for a fast, crowd-pleasing appetizer or snack ready in under 30 minutes.
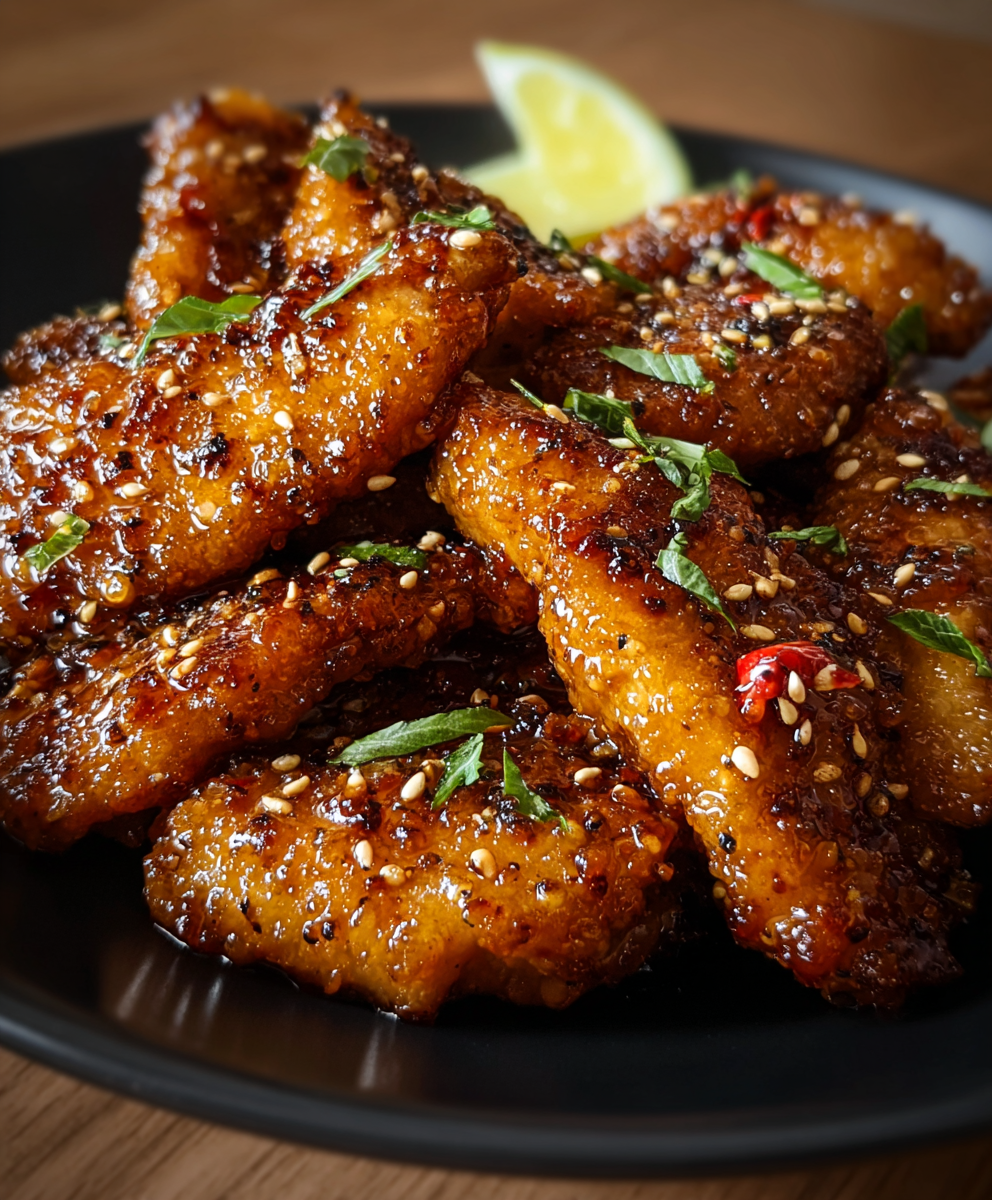
Air Fryer Honey Butter Garlic Chicken
Crispy air-fried chicken pieces tossed in a glossy honey-butter garlic glaze — a 20-minute weeknight favorite that's sweet, savory, and irresistibly sticky.
Did You Make This?
Leave a comment & rating below or tag @feedcooks on social media!
Rate This Recipe
Share This Recipe
Enjoyed this recipe? Share it with friends and family, and don't forget to leave a review!
Comments (1)
This recipe looks amazing! Can't wait to try it.
Comments are stored locally in your browser. Server comments are displayed alongside your local comments.
Hi, I'm Lena!
What's Popular
Get My 30-Minute Meals email series!
Quick and easy dinner ideas delivered to your inbox.