
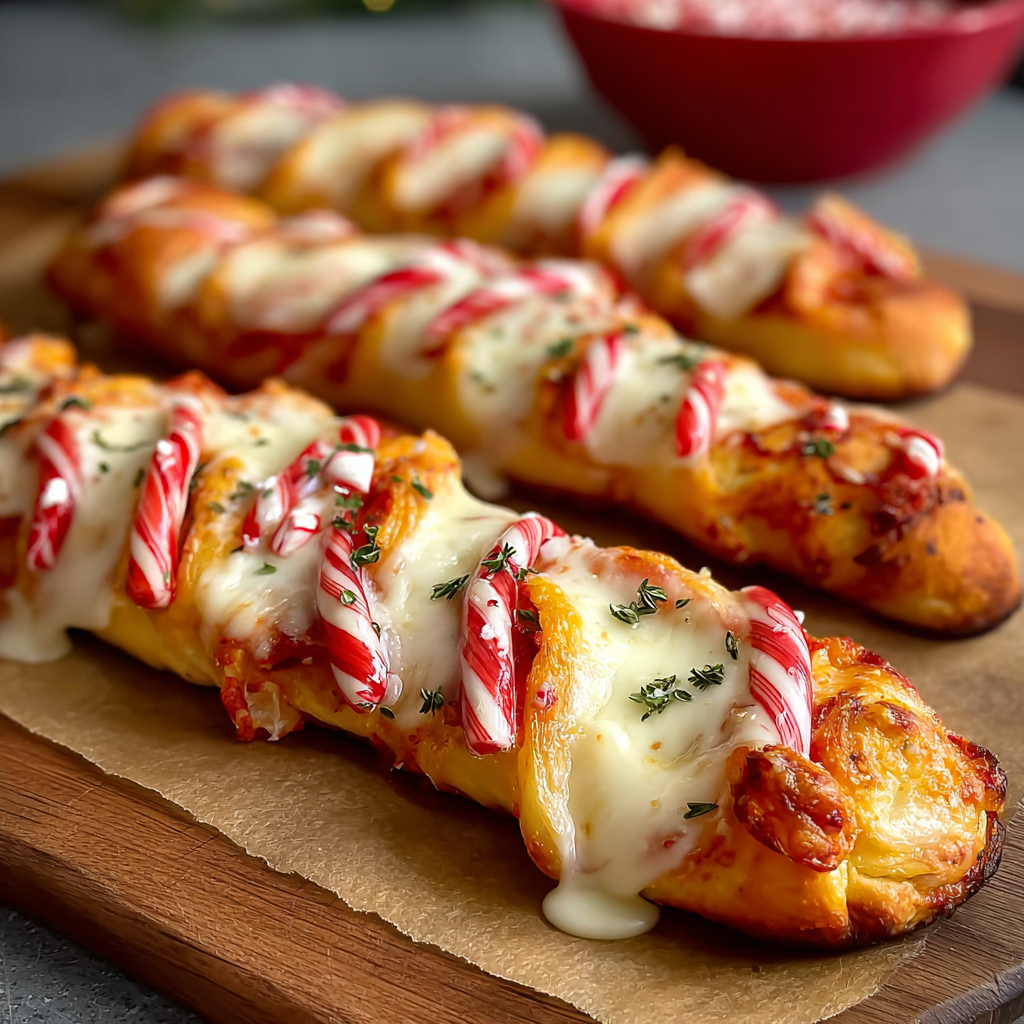
Candy Cane Pizza Bread Sticks

Festive candy cane–shaped pizza bread sticks with marinara, melted mozzarella, and a garlic-oregano finish — a playful appetizer perfect for parties and holiday gatherings.

Why You'll Love This Recipe
- Fast assembly: ready from fridge to oven in about 10 minutes, perfect for last-minute entertaining and weeknight appetizers.
- Kid-friendly: shaping into candy canes makes assembling a fun activity for kids and delivers a snack they’ll actually eat.
- Panfriendly ingredients: uses one can of refrigerated dough and pantry staples like marinara and dried oregano.
- Make-ahead friendly: you can assemble and refrigerate the shaped sticks for up to 6 hours before baking.
- Customizable: easily adapt toppings — swap mozzarella for a dairy-free alternative or add pepperoni ribbons for extra flavor.
- Perfect portioning: yields 6–8 sticks ideal for sharing alongside salads, soups, or charcuterie boards.
My family’s reaction the first time I served these was immediate: laughter at the shapes, then silence while everyone tucked in. They’re small enough to nibble while mingling but satisfying enough to replace a heavier appetizer. I love the theatrical reveal when the cheese first peeks out during baking — it’s one of those small, rewarding moments that makes cooking feel joyful.
Ingredients
- 1 (13.8-ounce) can refrigerated pizza dough: Choose a brand you trust; Pillsbury or store-brand refrigerated dough works well. The dough’s elasticity is key for twisting and holding shape — avoid very low-moisture doughs that crack.
- 1/2 cup marinara sauce: Use a good-quality jarred sauce such as Rao's or a robust supermarket brand. Thick sauce prevents soggy centers; if yours is thin, simmer briefly to reduce.
- 1 cup shredded mozzarella cheese: Freshly shredded whole-milk mozzarella melts best and gives a smooth, elastic pull; pre-shredded blends often contain anti-caking agents that resist melting.
- 1/2 teaspoon dried oregano: A classic aromatic that pairs with tomato and cheese; use Italian oregano or a pizza seasoning blend for extra depth.
- 1 tablespoon olive oil: Use a mild extra-virgin olive oil for brushing — it promotes browning and adds a silky finish without overwhelming the other flavors.
- Fresh thyme or basil (optional): A few leaves for garnish add color and a fresh herbal note; basil gives a sweet lift, thyme adds a savory edge.
Instructions
Step 1 — Preheat and prepare: Preheat the oven to 400°F (204°C). Line a baking sheet with parchment paper or a silicone mat and set aside. Having a hot oven ensures quick oven spring so the sticks puff slightly and the cheese melts without the dough overbrowning. Step 2 — Roll and divide the dough: Unroll the refrigerated dough onto a lightly floured surface. Press seams gently to smooth, then divide the dough into 6 equal portions for larger sticks or 8 for smaller finger-food sizes. Use your hands to roll each portion into a rope about 8–10 inches long. Consistent thickness helps even baking. Step 3 — Add sauce and cheese: Spread about 1 tablespoon of marinara along the center of each rope, leaving a 1/2-inch margin at both ends. Sprinkle roughly 2–3 tablespoons of shredded mozzarella down the sauce-lined center. Don't overfill — too much filling makes sealing difficult and slows baking. Step 4 — Shape into candy canes: Fold the dough over the filling and gently seal the seam by pinching with your fingers, then twist once or twice to create a spiral and curve the top into a candy cane hook. Press seams well so cheese doesn’t escape during baking. If any cheese peeks out, press gently back under the dough. Step 5 — Brush and season: Place shaped sticks on the prepared baking sheet, brush each with olive oil, and sprinkle with dried oregano and a pinch of salt. The oil promotes golden browning and keeps the crust supple while oregano adds a pizza-like aroma. Step 6 — Bake: Bake for 12–15 minutes at 400°F (204°C) until golden brown and cheese is melted inside. For a crispier finish, switch to the broil setting for 30–45 seconds while watching closely to avoid burning. Step 7 — Garnish and serve: Let sticks rest 2 minutes on the tray, then transfer to a serving plate. Garnish with torn basil or a few thyme leaves. Serve warm with extra marinara for dipping.
You Must Know
- Storage: these hold well refrigerated for up to 3 days; freeze pre-baked or unbaked sticks for up to 3 months.
- Reheating: rewarm in a 350°F oven for 6–8 minutes to restore crispness; avoid microwaving which makes the crust soggy.
- Nutritional snapshot: handheld portions are moderate in calories and rich in carbohydrates and dairy protein — good for casual sharing, not a low-carb option.
- Allergen note: contains wheat and dairy; substitute gluten-free dough and plant-based cheese for intolerance-friendly versions.
What I cherish most is how these sticks turn a simple pantry run into a celebration. Guests smile at the shape, kids race to decorate, and conversations naturally start around the oven as the aroma wafts through the house. They’re a reminder that small creative touches make ordinary moments feel special.
Storage Tips
Allow the sticks to cool to room temperature before storing to avoid condensation that softens the crust. Refrigerate in an airtight container separated by parchment to keep surfaces from sticking together; they’ll stay fresh for up to 3 days. For longer storage, flash-freeze on a tray then transfer to a resealable freezer bag — frozen unbaked sticks can be baked from frozen with an extra 4–6 minutes added to the bake time. To reheat, pop them in a 350°F oven for 6–8 minutes; a toaster oven works equally well for single portions.
Ingredient Substitutions
If you need to substitute, use a gluten-free refrigerated dough in the same weight and shape for a wheat-free version; note that texture will be slightly different and may crack more easily when twisted. Swap mozzarella for a dairy-free shreds blend for lactose intolerance, or use provolone for a sharper profile. If marinara is too thin, mix 1 tablespoon of tomato paste into 1/2 cup sauce to thicken without altering flavor. Add cooked, finely chopped pepperoni or crumbled sausage for extra savory depth, or scatter a few red pepper flakes inside for heat.
Serving Suggestions
Serve alongside a bowl of warm marinara for dipping and a simple arugula salad dressed with lemon vinaigrette to cut through the richness. For a party platter, pair with sliced cheeses, olives, and roasted red peppers. Garnish each stick with a basil leaf or thyme sprig for color. These also make fun additions to a kid’s lunchbox (cooled and wrapped) or as a side for soup — tomato soup is a classic match that amplifies the pizza flavors.
Cultural Background
The idea blends Italian-American pizza flavors with playful holiday presentation. Bread sticks and pizza share common origins in simple yeasted doughs topped with tomato and cheese — portable adaptations have existed in many forms, from stromboli to calzones. Shaping foods into festive silhouettes is a longstanding tradition across cuisines to celebrate seasons and holidays, and these candy cane forms are a contemporary nod to that practice, combining quick convenience with a decorative flourish.
Seasonal Adaptations
For winter holidays, use a mixture of red and white toppings to emphasize the candy-cane theme: dotted beet or roasted red pepper purée can add color contrast. At summer gatherings, switch marinara for a light pesto and add sun-dried tomatoes with fresh basil. Around Halloween, twist the ropes into broomstick shapes and top with smoked mozzarella for a smoky note. Small adjustments to herbs and fillings let you tailor the snack to seasonal produce and celebrations.
Meal Prep Tips
Assemble sticks on a parchment-lined tray and refrigerate for up to 6 hours before baking — this is perfect for staging a party. For bulk prep, shape and freeze unbaked sticks flat on a sheet; once frozen, stack them in a bag. To serve from frozen, bake at 400°F for 18–20 minutes. If packing lunches, cool completely then wrap in foil; reheat in an oven or toaster oven for best texture. Keep a small jar of warmed marinara available for dipping and a shaker of extra oregano for guests who like more seasoning.
These candy cane pizza bread sticks are a delightful example of how a small creative twist can make simple ingredients feel festive. Whether you’re feeding a crowd or adding cheer to a family dinner, they’re quick, adaptable, and reliably popular — give them a try and make them your own.
Pro Tips
Brush with olive oil just before baking to encourage even browning and prevent the dough from drying out.
If the marinara is watery, reduce it on the stove for 5 minutes so it doesn't sog the dough.
For easiest shaping, chill the dough for 5 minutes after rolling to make it slightly firmer and less sticky.
This nourishing candy cane pizza bread sticks recipe is sure to be a staple in your kitchen. Enjoy every moist, high protein slice — it is perfect for breakfast or as a wholesome snack any time.
Tags
Candy Cane Pizza Bread Sticks
This Candy Cane Pizza Bread Sticks recipe makes perfectly juicy, tender, and flavorful steak every time! Serve with potatoes and a side salad for an unforgettable dinner in under 30 minutes.
Instructions
Preheat and prepare
Preheat oven to 400°F (204°C). Line a baking sheet with parchment paper or a silicone mat to prevent sticking and promote even browning.
Roll and divide dough
Unroll refrigerated dough onto a lightly floured surface. Divide into 6 equal portions and roll each into an 8–10 inch rope for consistent baking.
Add sauce and cheese
Spread about 1 tablespoon marinara down the center of each rope and sprinkle 2–3 tablespoons shredded mozzarella. Avoid overfilling to prevent leaks.
Shape into candy canes
Fold dough over the filling, pinch to seal, twist gently, and curve the top into a hook to form a candy cane. Ensure seams are sealed.
Brush and season
Arrange sticks on the baking sheet, brush with 1 tablespoon olive oil, and sprinkle 1/2 teaspoon dried oregano across all sticks for flavor.
Bake and serve
Bake at 400°F for 12–15 minutes until golden brown and cheese is melted. Let rest 1–2 minutes, garnish with basil or thyme, and serve with extra marinara.
Last Step: Please leave a rating and comment letting us know how you liked this recipe! This helps our business to thrive and continue providing free, high-quality recipes for you.
Nutrition
Did You Make This?
Leave a comment & rating below or tag
@feedcooks on social media!
Categories:
You might also like...
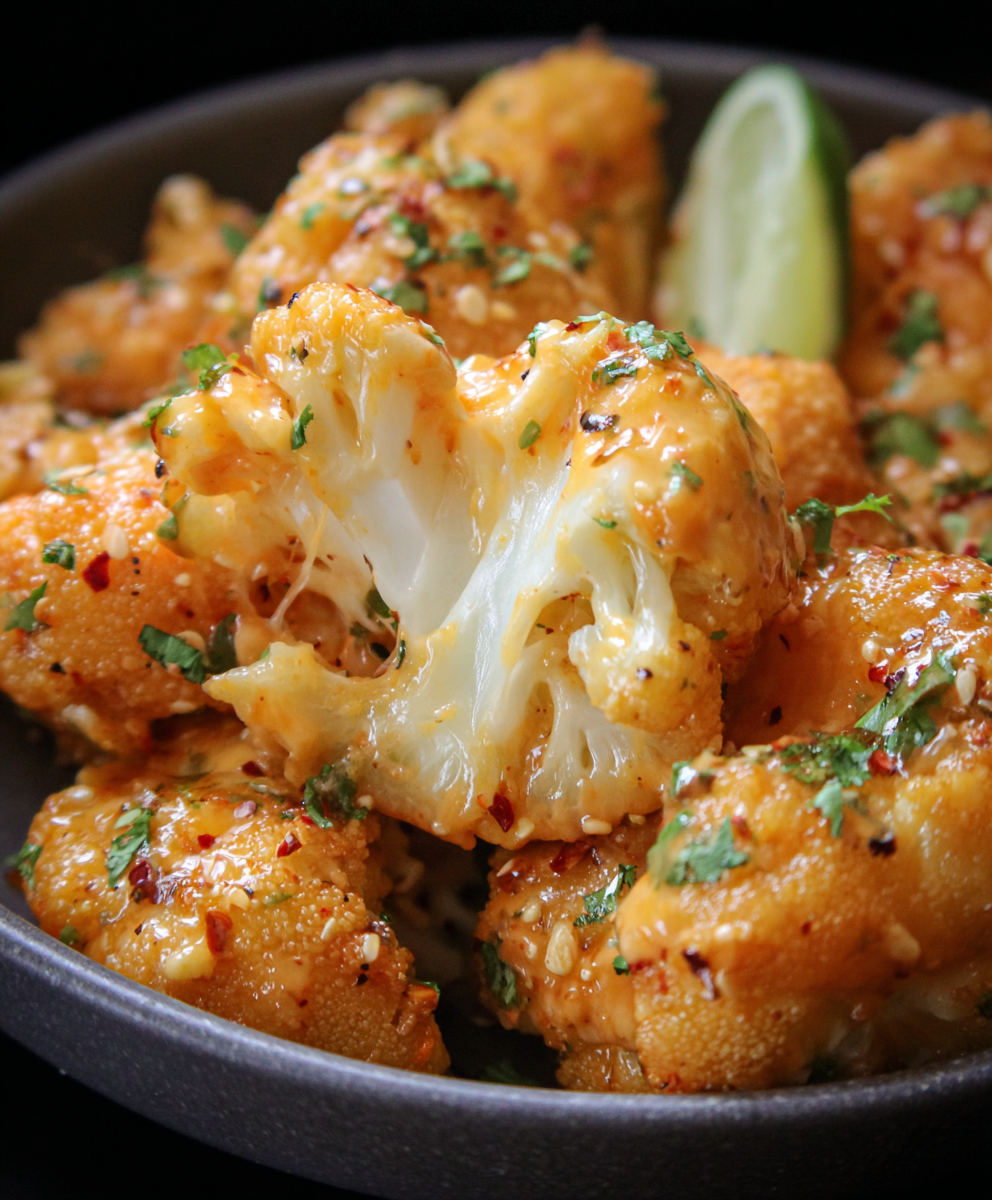
Air Fryer Bang Bang Cauliflower
Crispy air-fried cauliflower tossed in a creamy, sweet-spicy bang bang sauce. A crowd-pleasing appetizer or vegetarian main that's quick, crunchy, and addictive.

Air Fryer Buffalo Cauliflower
Crispy, tangy buffalo cauliflower made in the air fryer for a fast, crowd-pleasing appetizer or snack ready in under 30 minutes.
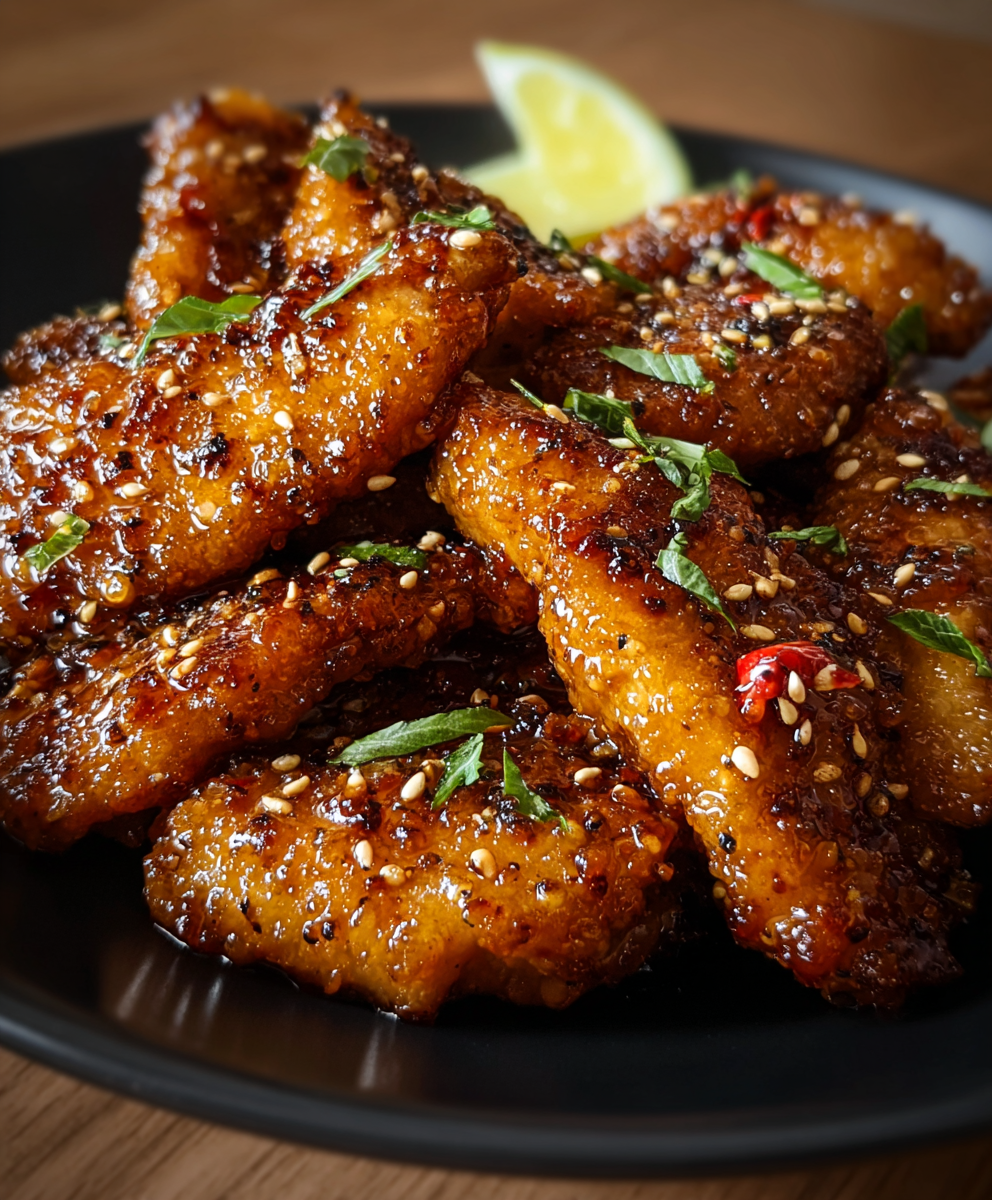
Air Fryer Honey Butter Garlic Chicken
Crispy air-fried chicken pieces tossed in a glossy honey-butter garlic glaze — a 20-minute weeknight favorite that's sweet, savory, and irresistibly sticky.
Did You Make This?
Leave a comment & rating below or tag @feedcooks on social media!
Rate This Recipe
Share This Recipe
Enjoyed this recipe? Share it with friends and family, and don't forget to leave a review!
Comments (1)
This recipe looks amazing! Can't wait to try it.
Comments are stored locally in your browser. Server comments are displayed alongside your local comments.
Hi, I'm Lena!
What's Popular
Get My 30-Minute Meals email series!
Quick and easy dinner ideas delivered to your inbox.